At Amalie Beauty we are big believers in the importance of eyebrows. They really can make or break your entire look. It doesn’t matter how sharp your eyeliner’s wing is, or how bold your lip looks, if your brows look tragic–it’s a lost cause.
In order to help you do it right, here are a few tips and tricks for filling in your brows, and mistakes to avoid along the way:
BROW FILLING 101: ADD DIMENSION TO YOUR FILLING
The most common mistake people make when they are filling in their eyebrows is applying product to the entire brow with one product, in one color.
In order to make your brows look as natural as possible, try one of these methods:
1. Fill brows only in sparse areas, with a powder, matching your brow color
2. Fill brows only in sparse areas, with a very fine pencil (Like ABH’s Brow Wiz) using fine, hair-like strokes
3. Fill in brows with a lighter pencil in the front half (to the arches) and a shade darker pencil in the second half (arches out)
Pro Tip: As an additional, natural-looking option, you can use a brow wax to set the hairs into place, after filling in any sparse areas, following one of the methods outlined above.
BROW FILLING 101: DON’T FILL IN BROWS TOO DARK
While one of the goals of filling in your eyebrows is to make them look darker, going too dark can take them from bold to scary. When choosing the best shade for your brows it’s best to pick one that’s only a shade darker than your natural hair color. Try to avoid a black brow pencil unless your hair is truly black.
Pro tip: If you really want to take your brow filling to the next level, get one color matching your hair for the inner half and one a shade darker for the outer half (arches outward).
BROW FILLING 101: DON’T MAKE YOUR BROWS SQUARE
Squaring off the front of your brow is a dead give away that you’re using way too much product (and incorrectly at that). In other words, don’t box your brows in. Drawing a box for them to fit in.. not so cute.
Pro Tip: This area can be a little bit tricky to get right, but it’s best to use a light hand and create short, hair-like strokes that look like your natural “sprouts” – that’s the technical word for those hairs right near the bridge of your nose, and believe me.. they’re so in right now.
BROW FILLING 101: BLEND IN YOUR PRODUCT
An easy way to make your brows look natural is by using a spoolie–that’s the brush at the end of the brow pencil–to disperse the product. Harsh lines will give your brows a “drawn on” look which is the opposite of what you want.
Pro Tip: A great tip for filling in your brows is to draw a line (at an angle) under your eyebrow. This looks weird at first, but if you’re only drawing in sprouts, your brow will lack any type of definition (tried that route, don’t love it). After you’ve drawn that line: BLEND, BLEND, BLEND! And enjoy your beautiful looking brows.
BROW FILLING 101: GROOM YOUR BROWS INTO PLACE
Once you’ve filled in your brows, be sure to groom them into place. Many people think that brow gels and waxes are unnecessary, so they skip this step without realizing how much it can help.
Pro Tip: Take your clear gel or wax and brush the front of your brows–your sprouts–up. Once the front is set, brush the rest of the hair upwards and outwards. This will not only keep them in place, but also make them appear fluffy and full.
BROW FILLING 101: NO STENCILS, NOT EVER
Step away from the brow stencils! In theory they are supposed to be a way to get perfectly shaped eyebrows. However, brows are simply not one size fits all. More often than not, stencils create a brow that doesn’t work with everyone’s individual face shapes. Always go with your own natural shape for a more complementary style. Follow the natural arch of your brows.
Pro Tip: Instead of using a pre-set brow stencil, follow your face’s natural shape. Line up the brow pencil with the outer edge of your nostril: that’s where your brows start. Corner the pencil out and match it with the outer edge of your iris: that’s your arch. Again, corner it out to match with the outer corner of your eye: that’s the end of your brow line. Ta-da! Your own unique stencil, crafted by the unique shape your face. Follow those marks to shape your brows.
TAKEAWAYS: BROW FILLING 101
Finally, don’t obsess about whether or not your brows are even. Your eyebrows are sisters, not twins. Even if they’re just cousins some days, that’s fine! That’s just life.
Too much symmetry can look very fake, but making them too uneven can look seriously wonky. Nailing the perfect brow is a lot harder than it looks and can take some serious practice. But have patience, and good brows will come. I promise!
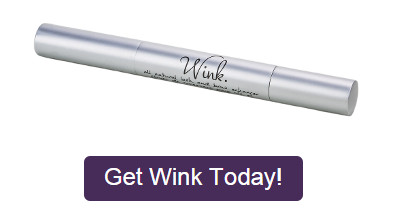
If you need help getting your brows to that next level, consider using our brow enhancer, WINK (available here).
For more brow tips and tricks, download our FREE E-book, the Amalie Brow Bible (here) or click on the image below:
What do you think about our brow filling tips? Did we miss anything?


